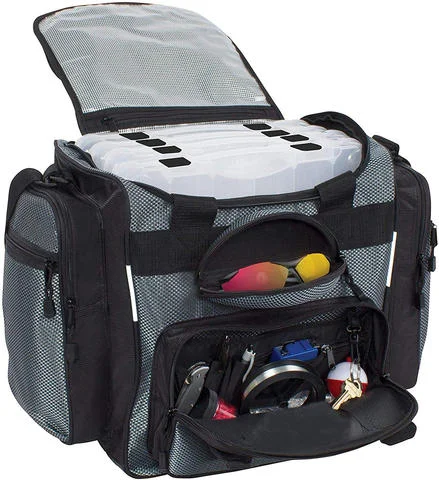
Most homeowners own tools. Far fewer have a system for storing and accessing them when a project or emergency arises. A dedicated tool bag transforms scattered screwdrivers and borrowed hammers into a portable kit you can grab and go within seconds — whether you are hanging a picture frame in the living room or repairing a fence on a Saturday morning. This guide helps you choose, stock, and maintain a DIY tool bag that actually works for real home needs rather than looking impressive on a store shelf.
Why Every Homeowner Needs a Dedicated Tool Bag
Home repair urgency does not announce itself politely. A pipe starts leaking at 9 PM. A door hinge breaks the night before guests arrive. A tree branch punches through a window during a storm. In each scenario, you need tools quickly, in the dark, often in an awkward location. The homeowner with a stocked tool bag already by the garage door is finishing the repair while the one without one is still digging through a junk drawer hoping a flathead screwdriver materialized.
Beyond emergencies, a tool bag makes routine maintenance manageable. Hanging shelf brackets, tightening cabinet hinges, assembling furniture, and checking smoke detector batteries all require tools — and a bag that lives near the work rather than in a high shelf keeps you from avoiding small jobs simply because fetching the tools feels like a project itself.
Choosing the Right Tool Bag for Home Use
DIY tool bag requirements differ from professional contractor needs in one important way: versatility matters more than extreme durability. A homeowner is not loading 40 pounds of impact drivers into the bag daily, but they are carrying it up a ladder, across a basement, and into a crawl space occasionally. The bag should handle these varied conditions without specialized training or equipment knowledge.
Size: Start medium, not large. A 12-to-14-inch open-top bag hits the sweet spot for most home users. It holds a complete starter kit comfortably while remaining light enough to carry with one hand. Larger bags encourage over-packing and add unnecessary weight for the typical home repair scenario. If you find yourself consistently needing more capacity, upgrade to an 18-inch bag rather than forcing everything into a oversized model from the start.
Material: Polyester or canvas, not leather. For home use exposed to varying conditions — damp basements, dusty garages, humid outdoor storage — polyester or canvas offers the best balance of durability, weight, and price. Canvas breathes better and resists UV damage from garage window exposure; polyester cleans more easily when you accidentally drag it through a dusty attic. Either works; both outperform leather for home storage convenience.
Pockets: Multiple exterior pockets are more valuable than interior dividers. Home users typically carry fewer distinct tool categories than professionals, but they need rapid access to tape measures, levels, and screwdrivers without digging through the main compartment. Four to six exterior pockets of varying depths accommodate the most frequently used items while keeping the main interior space for bulkier tools.
Open-top over zippered. For general home use, open-top access is faster and more versatile. You are not working in rain or mud constantly, and the ability to throw tools in and grab them out without dealing with zippers makes the bag more likely to actually get used for small tasks.
Essential Tools for a Homeowner Tool Bag
Building a complete DIY kit does not happen in one shopping trip — it happens over years as specific projects demand specific tools. Start with this foundation and add based on actual need:
Hand Tools (non-negotiable core):
- 20-foot tape measure — the most-used tool in any home repair scenario
- 16-ounce claw hammer — drives nails and pulls them; the single most versatile striking tool
- Phillips and flathead screwdrivers, at least two sizes each — handle 90% of household screw tasks
- Adjustable slip-joint pliers — grip, bend, and hold various shapes
- Utility knife with spare blades — opens packaging, cuts drywall, scores materials
- Torpedo level (9-inch) — hanging anything straight requires this
- Allen wrench set (metric and SAE) — furniture assembly, fixture installation
Power Tools (if you already own them, they belong in the bag):
- Cordless drill with bit set — eliminates manual screwdriving for most tasks
- Cordless screwdriver for light-duty work — faster than fetching the full drill
Consumables and Hardware (keep a small separate pouch or zippered pocket):
- Assorted screws and nails in various sizes — always seem to need something not in the original hardware bag
- Wire nuts — useful for electrical repairs and wire splicing tasks
- Electrical tape and duct tape — each fixes different categories of problems
- Spare batteries for cordless tools
Safety and Convenience Items:
- Flashlight or headlamp — electrical work, dark spaces, and circuit breaker boxes all require light
- Work gloves — protect hands during rough demolition or material handling
- Knee pads — if you work on floors frequently, these are genuinely useful
- Small first aid kit item — a few bandages in the bag bottom for minor cuts that happen on every project
Organizing Your Bag for Real Use
The difference between a useful tool bag and a frustrating heap of metal is organizational strategy, not budget. A few consistent habits keep any bag functional.
Keep the heaviest tools in the center of the main compartment where the bag naturally wants to stand upright. This maintains bag stability when set down. Place the tape measure and level in exterior pockets — these are grabbed most frequently and should never require opening the main compartment. Store small hardware in a dedicated zippered pouch or pocket within the bag, not loose in the main interior where it rattles and separates.
Establish a return-to-origin habit: every tool goes back to its designated pocket after use. This takes two seconds and prevents the slow degradation of organization that turns a functional bag into a tangled mess over months of use.
When to Upgrade Your Tool Bag
Signs your current bag has reached its practical limit include: handles pulling away from seams after normal use, the bottom sagging or losing rigidity when loaded, exterior pockets tearing repeatedly despite repairs, and the bag no longer standing upright when placed on the floor. These indicate structural failure rather than normal wear, and a new bag is the appropriate solution rather than continued patching.
If your tool collection has grown to the point where the bag feels perpetually overstuffed, consider graduating to a two-bag system: a primary bag for everyday items and a larger storage bag for tools used only on specific project types. This is the same approach professionals use, adapted for homeowner scale.
Storing Your Tool Bag Between Uses
Location matters for a home tool bag more than professional bags. The bag should live somewhere convenient to actual work areas — not in a high garage shelf behind Christmas decorations. A hook near the garage door, a designated shelf in a utility room, or under a workbench keeps the bag accessible without requiring a dedicated expedition to retrieve it. A bag that lives at arm reach gets used; a bag that requires climbing a ladder to access gets ignored for years until something forces the issue.
Frequently Asked Questions
What size tool bag does a homeowner need?
A 12-to-14-inch bag suits most home tool collections. This provides enough capacity for a complete starter kit without encouraging over-packing. If your collection exceeds what fits comfortably in this size, step up to an 18-inch model rather than forcing a larger bag that adds unnecessary weight.
Should I buy an expensive tool bag for home use?
Not necessarily. Home use does not stress bags the way professional daily loading does. A mid-range polyester or canvas bag in the $40-70 range typically provides adequate durability for homeowner use patterns. Reserve premium bags for situations where you carry heavy tools daily over long distances — conditions most homeowners rarely encounter.
How do I prevent my tool bag from becoming disorganized?
Designate a specific pocket for each tool and return everything to its pocket immediately after use. Once per month, empty the bag completely, shake out debris, and verify every tool is in its designated location. This two-minute habit maintains organization indefinitely.
Is a tool backpack or hand-carried bag better for homeowners?
Hand-carried open-top bags suit homeowners better for most scenarios. The portability requirements are lower than professional use, and hand-carried bags offer faster access. Backpack-style bags make sense only if you regularly carry tools across significant distances or up and down stairs.
Conclusion
A homeowner tool bag is a practical investment in the ability to handle home repair and maintenance quickly rather than deferring it indefinitely. Choose a medium-sized open-top bag with multiple exterior pockets, stock it with the core tools listed above, and maintain organization by returning everything to its designated pocket after each use. A properly configured bag makes the difference between addressing small problems when they are minor and ignoring them until they become expensive emergencies.